
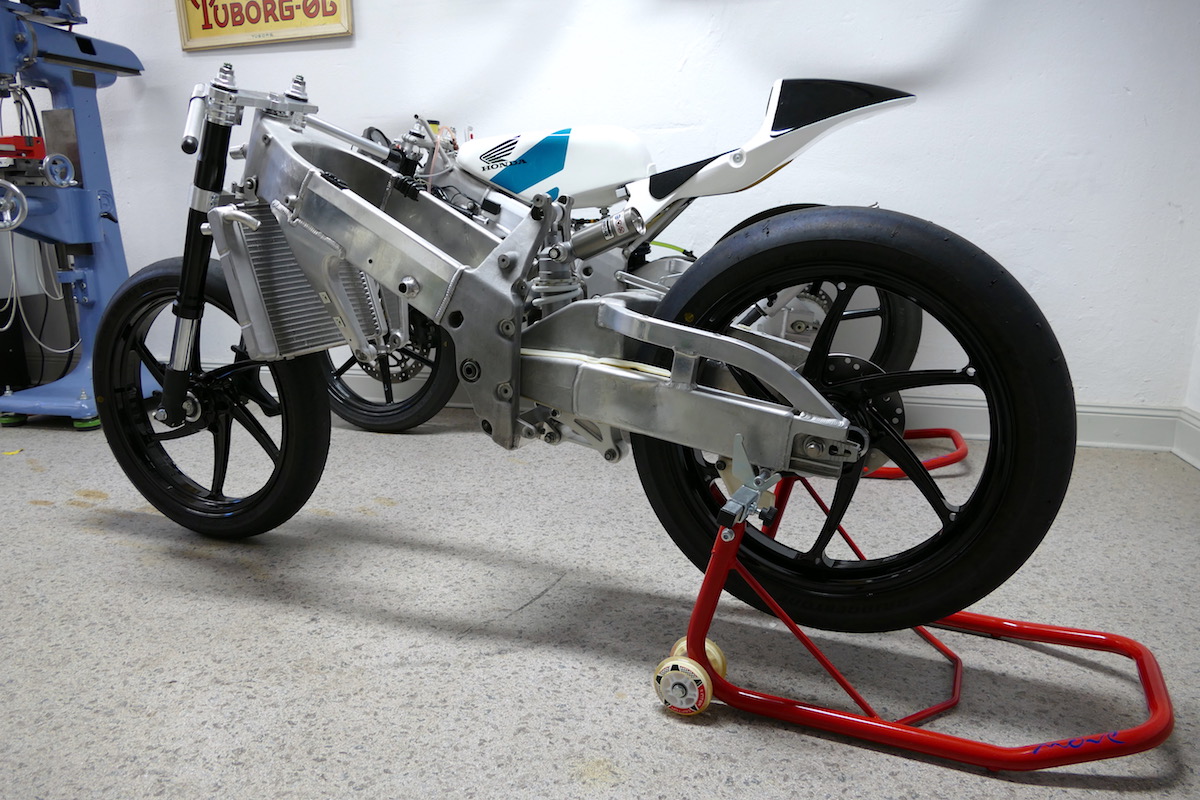
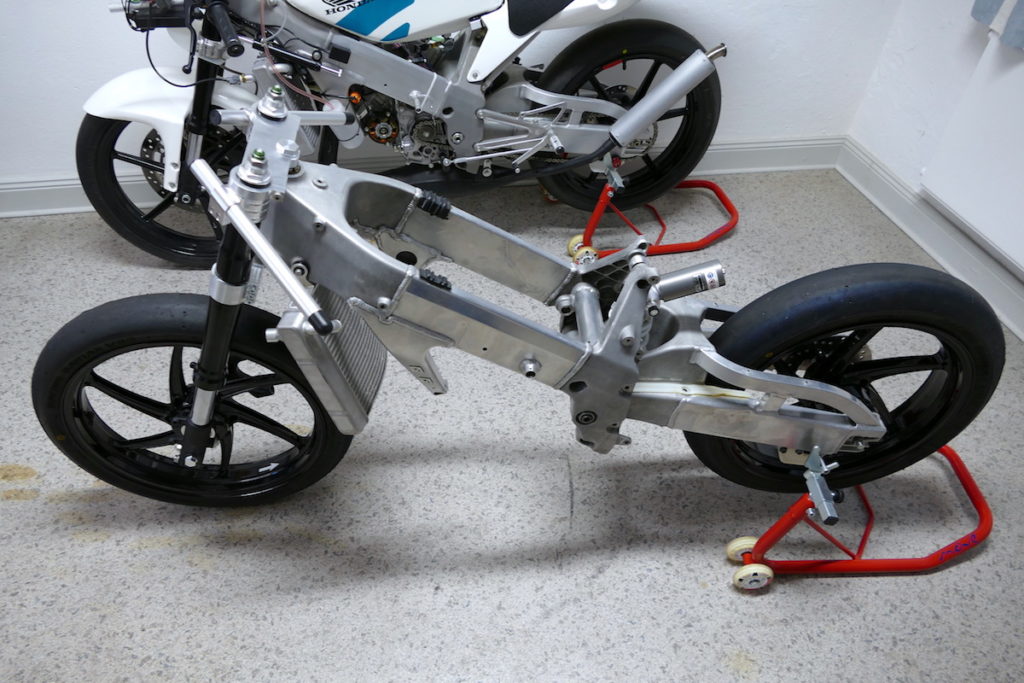
Updates are a little slow but we have managed to get quite a bit done. The chassis is almost complete, just needs a few small items but we can call it a rolling chassis now. A quick list of all the goodies you can see in the picture. The forks are new radial type forks from a 2004 model RS and the wheels are PVM. The rear shock is a rebuilt stock unit from our 2009 RS. The front axel is made out of 7075 and the rear axel is Titanium. The triple clamps were made in the shop and are made out of Dural.
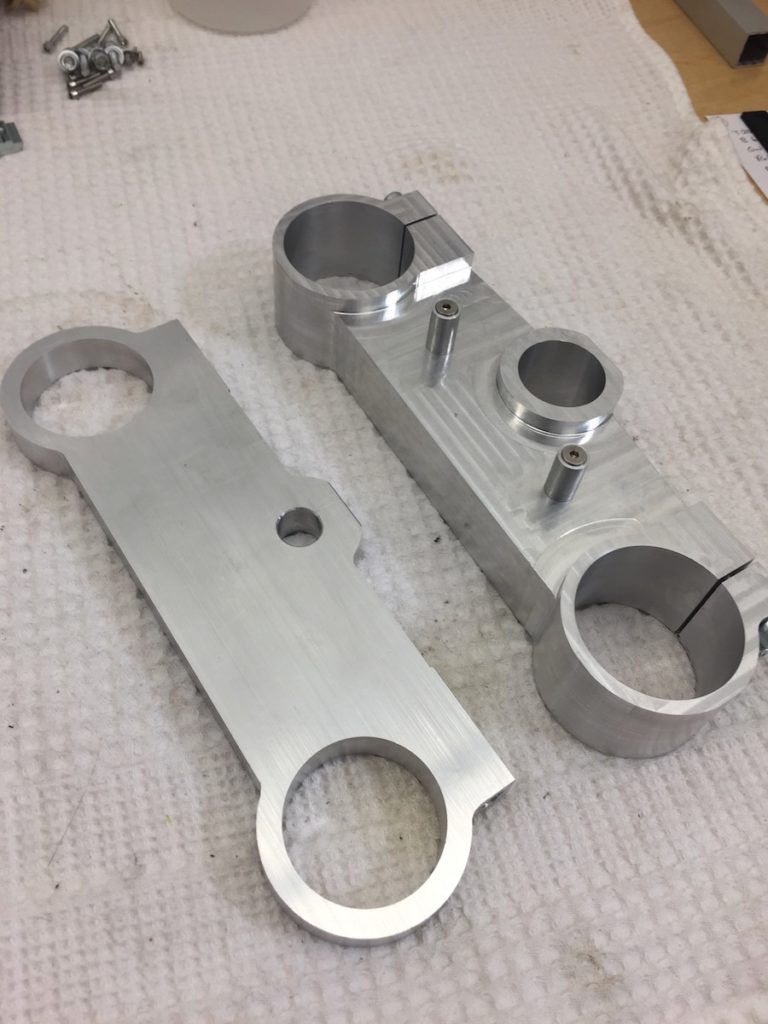
The yokes/triple trees were quite a challenge to make. The design is quite simple as they had to be made using manual machines. The Dural was great to work with and is quite strong. This material was developed for use in the Aerospace Industry.
The only downside to using it is, it cannot be anodized and is quite vulnerable to the elements compared to other aluminum alloys. At the moment, they are still bare metal but that may change in the future.
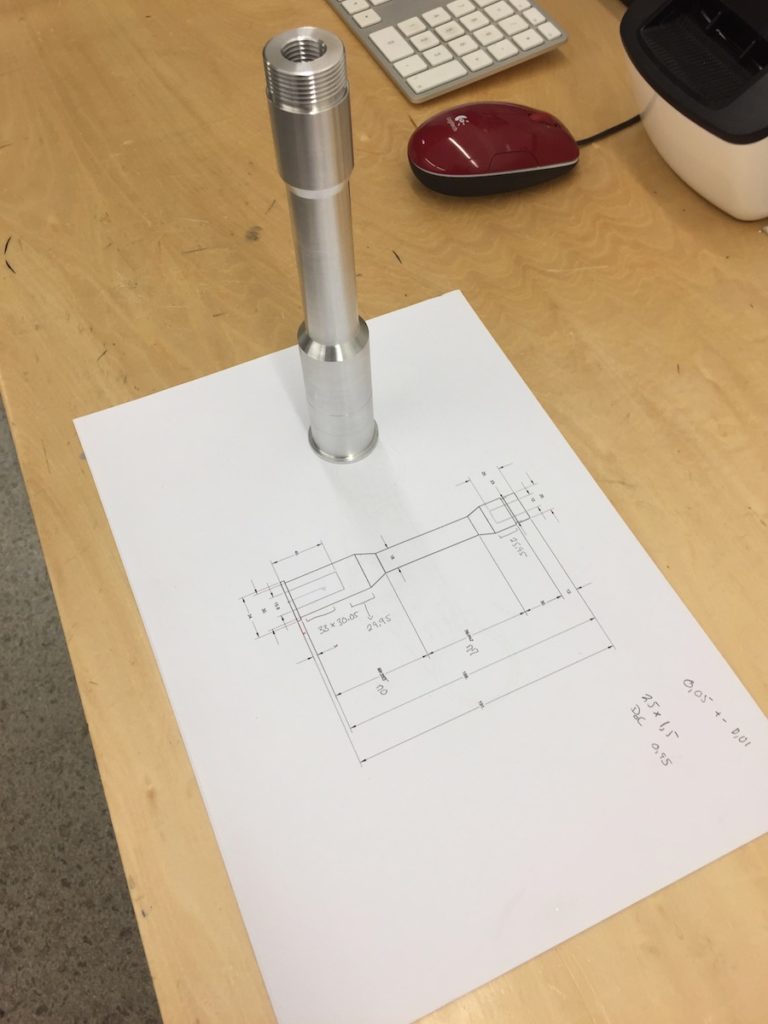
The stem is made out of 7075/Ergal. Not much to say here, again the design was influenced by the size/type of machine used to make the part.
The stem was made to be pressed into the lower clamp, no pinch bolts used here. Just careful work and a 20 ton press …
The clamps and stem are more than strong enough for this application. The original clamps are also fine as the forks themselves will flex long before the clamps do.
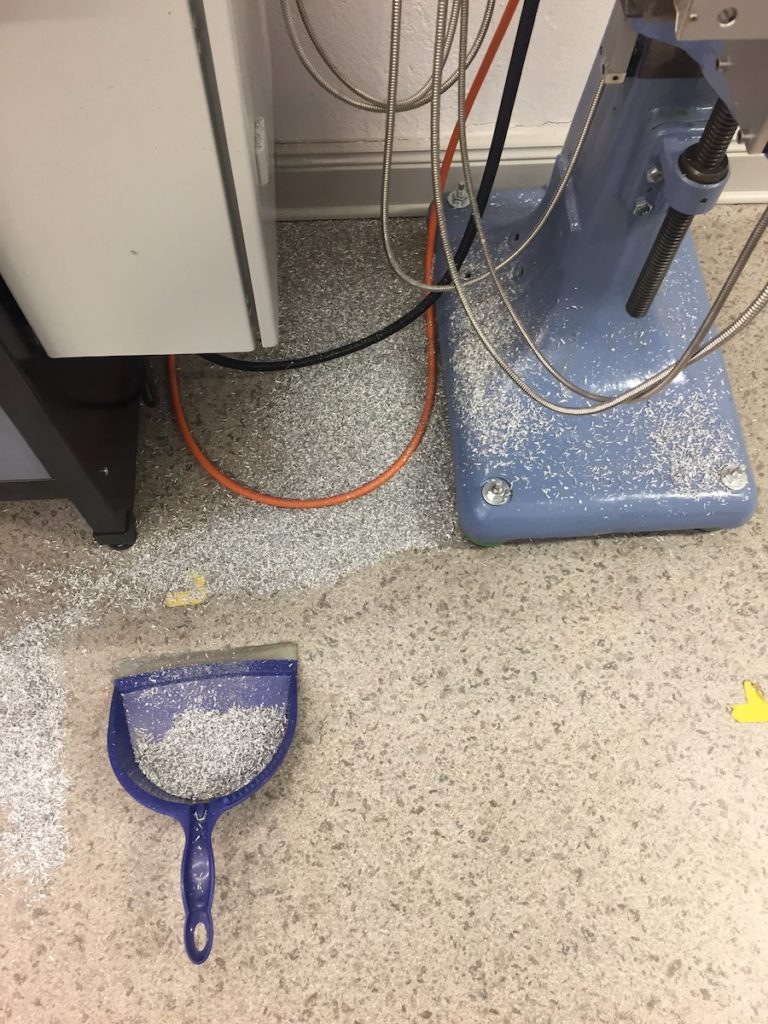
One thing I noticed making these parts is that I seemed to be spending more time cleaning away chips than I did actually machining the parts. I turned a complete block of aluminum into a big bag of chips…
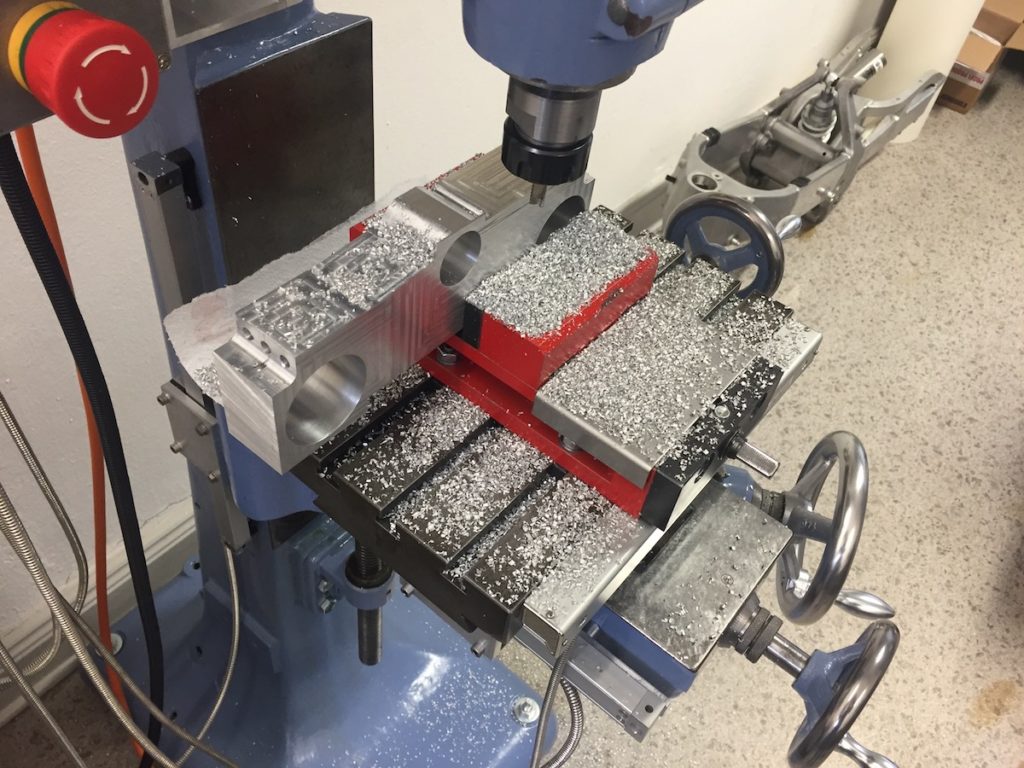
Making these parts was very time consuming! I learned a lot doing this and that was kind of the idea. With the pockets, chip evacuation was a real problem as recutting chips can dull your expensive tools fast. I used compressed air to clear out the pocket as I worked but still could not avoid a few chips. I actually had to use 5 different VHM cutters to make these parts.
I only managed to break one end-mill. It broke while I was climb-milling, it yanked the wheel out of my hand. OK, lesson learned…
Chassis 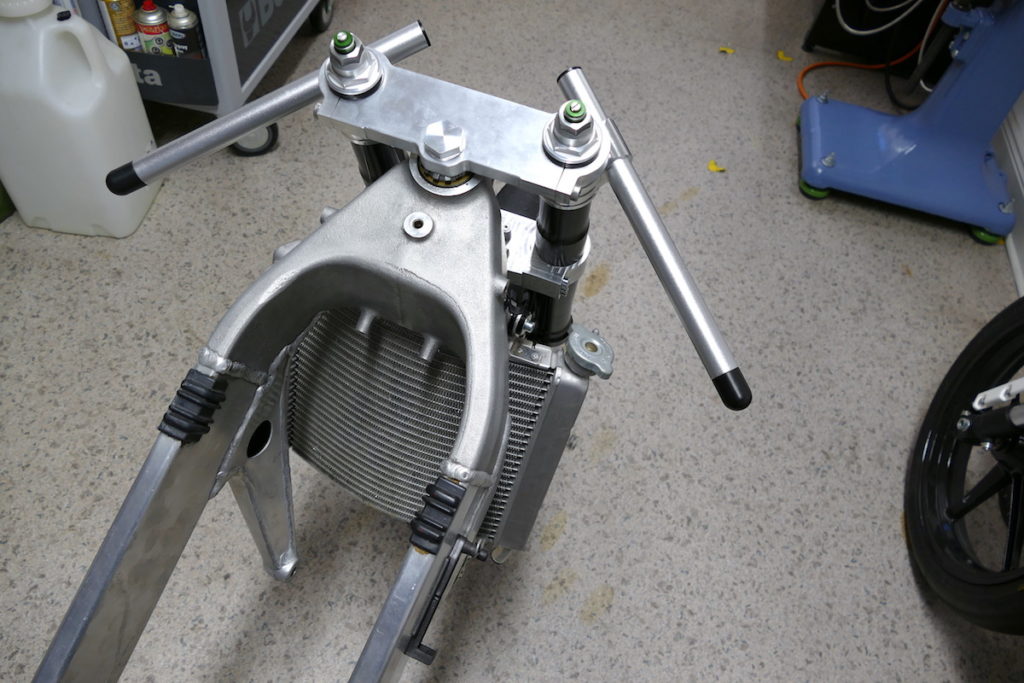
Top Clamp 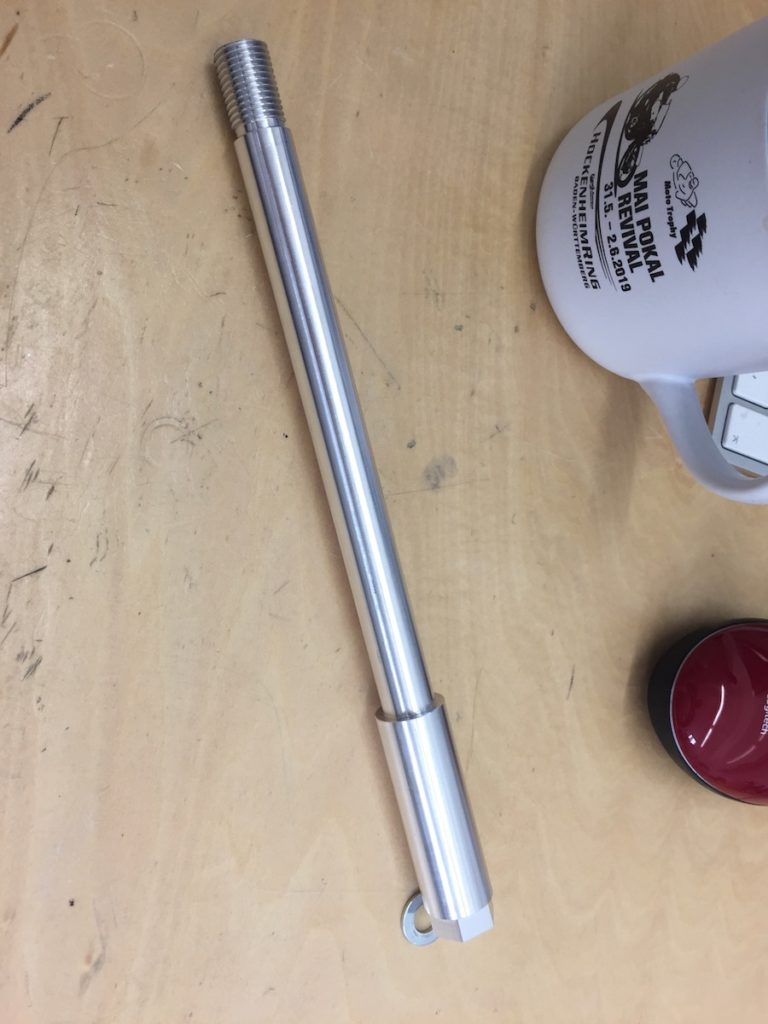
Front Axel 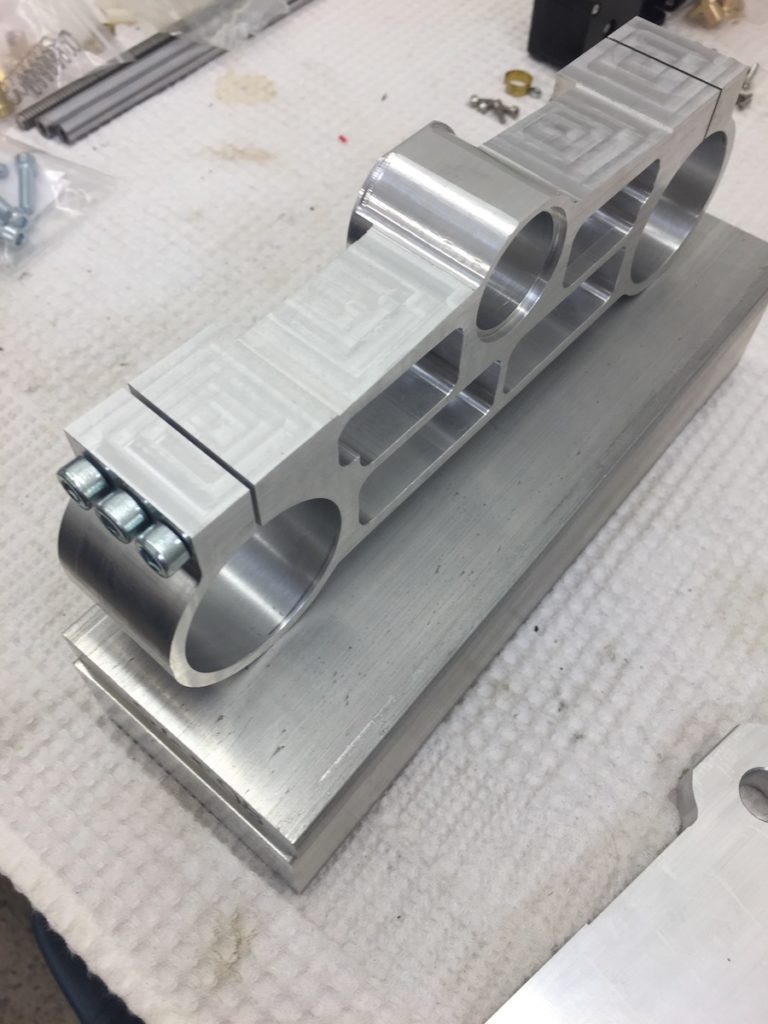
Lower Clamp 
Lower Clamp 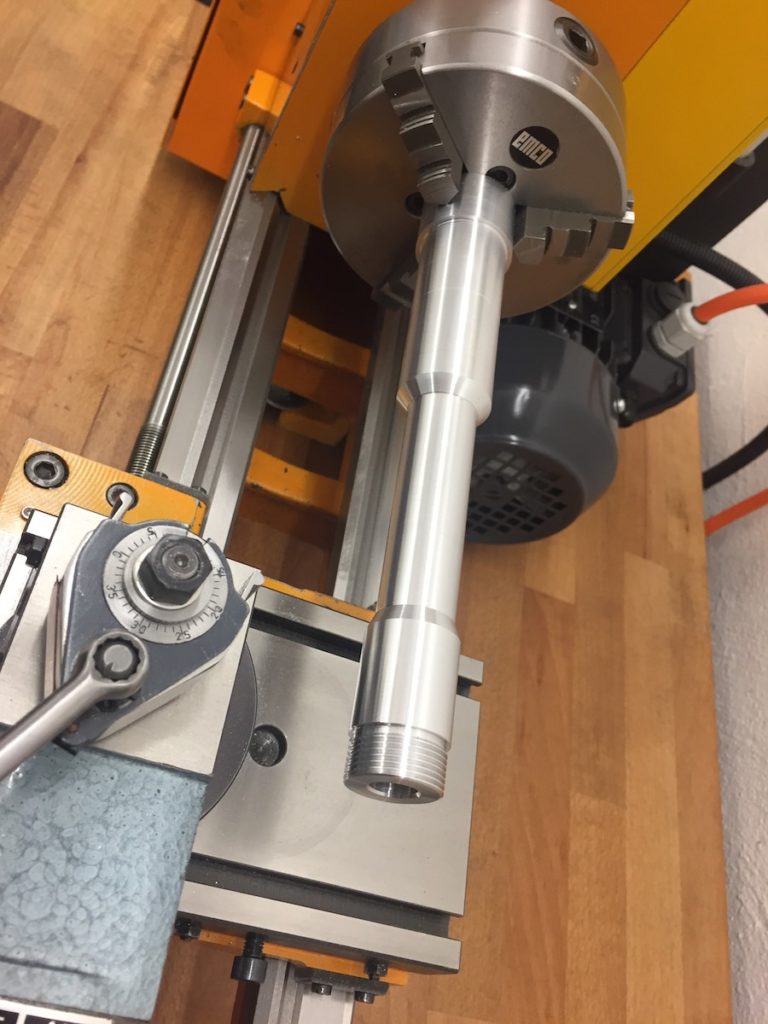
Stem
If you look at the pictures, you can see that we also installed the radiator. To do this, we had to make some new spacers and dampners. The dampners we printed on our 3D printer using some soft TPU filament. The stuff is pretty soft, so we were happy that we could actually print parts using it. The dampners are not perfect but 100% useable. The spacers were turned from a bar of 7075 (Ergal).

Thanks for stopping in and if you guys have any questions, feel free to contact us or leave a comment.
Hello!
I’m in a similar situation – I’m building an RS125 and can’t seem to find triple clamps for it but I do have access to a CNC machine, mill & lathe. Would you mind sharing the fork offset for the RS125? Thank you!
Hi A.K.
The stock fork offset for the 95-04 RS125 is 32.5mm. To make life easier I am using a DIN 70852 M24 slotted nut for the stem, they are alot esier to find than the original Honda part.
Gray
Danke schön, Herr Gray!
Is there any chance you’d be willing to share a few more specs? In particular, the distance between the center of the forks (forks center-to-center)? And would you be willing to email me a higher resolution picture of the stem diagram above? I can almost read most of the dimensions but there are a few that are fuzzy enough that I’m having to guess. Thank you!
Hi A.K.
The distance between the fork centers is 174mm.
The stem length will vary depending on how high your lower clamp is… The total length of my stem is 191mm, the bearing seat on then lower clamp is 36mm high.
Bearing seats are 30 and 25 respectivly and the stem necks down to 18mm. The top 12mm of the stem is threaded for the m24 slotted nut, for me using a manual lathe I needed to have a 2mm slot for tool clearance… you may not need this (effective threaded area is 10mm).
Hope this helps,
Gray
Herr Gray,
Thank you very much – your willingness to share ideas and information is a blessing to the moto community!